“Hey, want to come over for some hummus?” If I had a dime for every time I’ve said this to somebody over the last month, I’d have about two bucks!
Cilantro Jalapeno Hummus
I’ve always loved hummus, but since getting my very own (very cute, see below) food processor, I make it at least once a week. Spicy hummus, lime hummus, avocado hummus and plain old hummus – I’m obsessed with making and eating it. It’s so simple to make, and possibilities for experimenting with the recipe are endless (endless fun!).
The one recipe I kept coming back to in an effort to create was this amazing cilantro-jalapeno hummus I used to buy at Trader Joe’s in California all the time. It’s spicy, fresh and tangy. I’m proud to say that after many tasting sessions, I’ve created a version that I just love! The best part? It takes about 5 minutes from start to scooping it into your mouth with a pita chip.
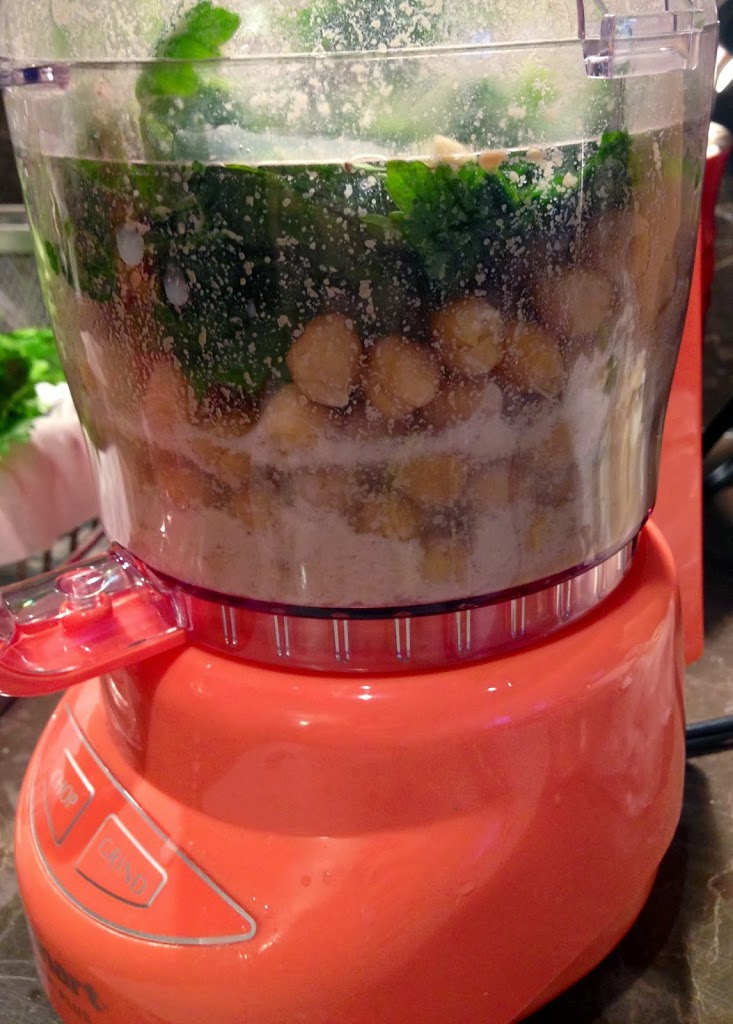
Cilantro Jalapeno Hummus ready to blend, like a sand-sculpture, only delicious.
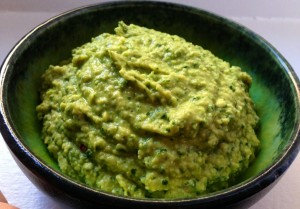
Creamy, spicy and tangy Cilantro Jalapeno Hummus - a perfect knock off of the Trader Joe's classic!
Ingredients
1 - 15 oz can garbanzo beans, also known as chick peas
⅓ cup water from the beans
1.5 tablespoons tahini - fairly readily available at most supermarkets
2 limes (or lemons if you like it less tangy)
2 small cloves of garlic, diced
1-2 jalapeno peppers, roughly chopped (1 for mildly spicy, 2 for a nice kick)
⅓ cup chopped cilantro
1 teaspoon salt
½ teaspoon pepper
Red pepper flakes (optional, if you like it extra spicy)
Instructions
Pulse the tahini paste together with the juice of the limes.
Drain the water off the beans into a cup. Rinse and drain the beans.
Add all the ingredients into the food processor.
Pulse/blend until smooth, about 3-5 minutes. Dip a spoon in periodically to taste and adjust seasoning. *Note: You can add about a tablespoon or two of olive oil to make your hummus creamier but I find that I never need it.
Serve with the chip or veggie of your choice... and enjoy!
I’m really excited about this post for a number of reasons:
My first post in almost 3 months!
It’s delicious.
Most importantly, this is a pistachio-centric collaboration that was the brainchild of the amazing David of Cocoa & Lavender. Read his fantastic co-post about Persian Pistachio soup here.
Persian Pistachio Baklava
David and I connected last year through our websites and our shared passion for food. After following his blog for months, we finally met face-to-face when he was in NYC this past spring. Over tea and firnee, I learned about his interesting background including the years he spent as the manager of a Persian carpet store while living in upstate New York and performing with the Albany Symphony.
During our meeting, I was flattered when David suggested doing a co-post with a common theme – pistachios! Through the connections he formed with his Persian colleagues and his love of food, he has become very well-versed in Persian cuisine and has since educated me in the incredible dish featured in his co-post.
After David’s description of the Pistachio Soup, I knew I wanted to do a sweet course that would complement his incredible dish, which is why I picked baklava. It’s a traditional dessert common to most Middle Eastern and Mediterranean cultures and can be made with really any nut. It’s often made with walnuts, but since I am allergic to walnuts and happen to love pistachios, this made perfect sense! As with most of my favorite recipes, it is a labor of love, but I like to think the more love goes into a dish, the more deliciousness comes out.
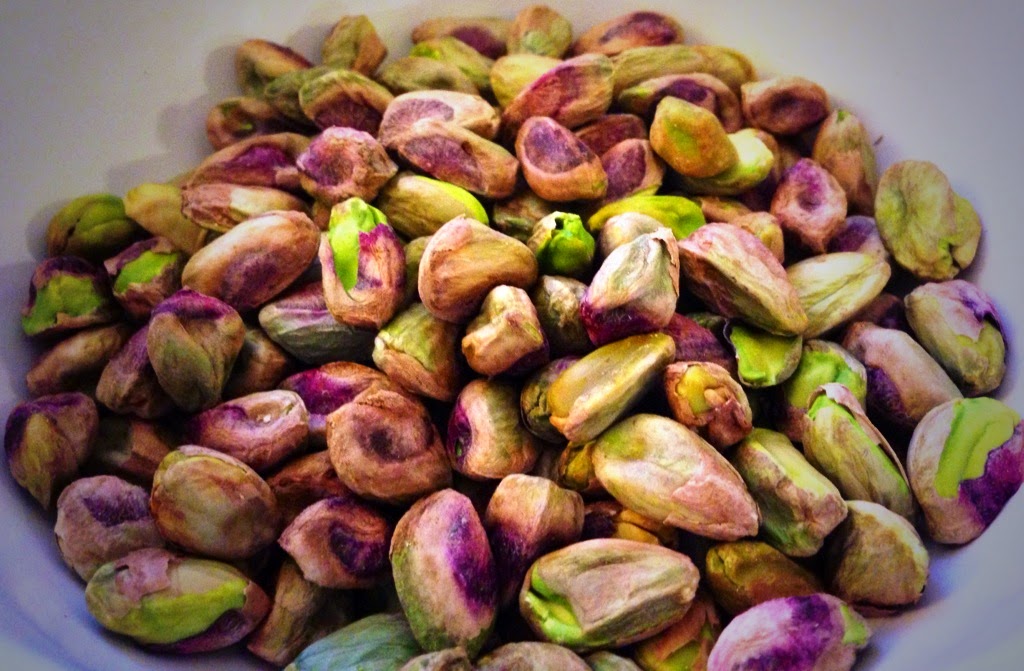
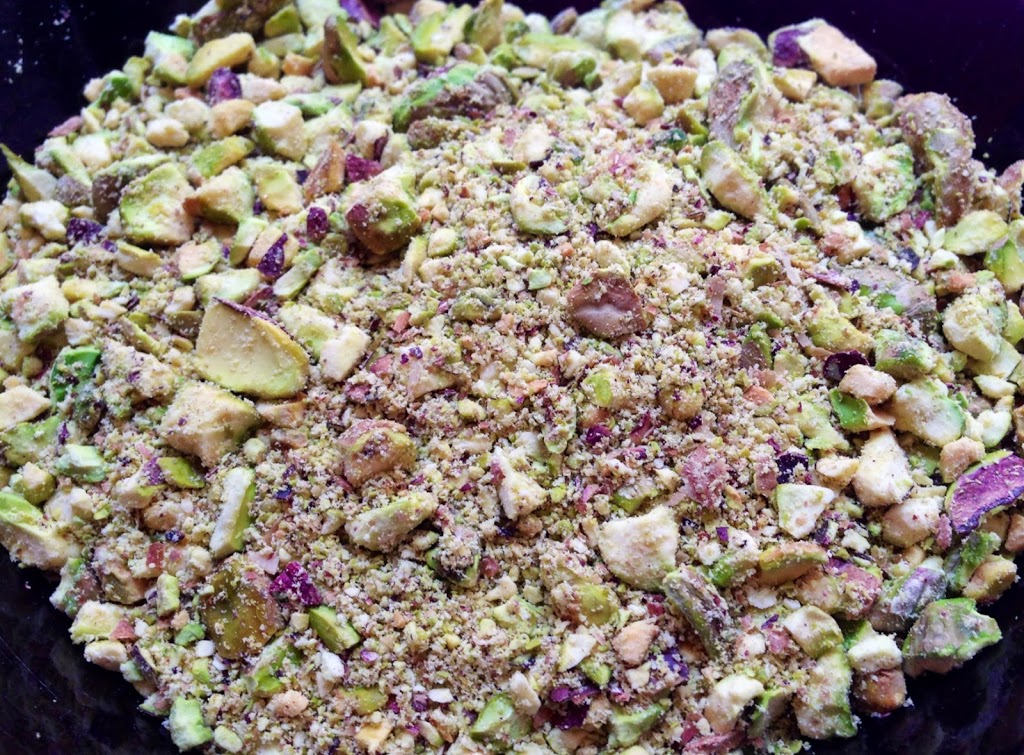
Pistachios ready to be ground
Pistachios ground up
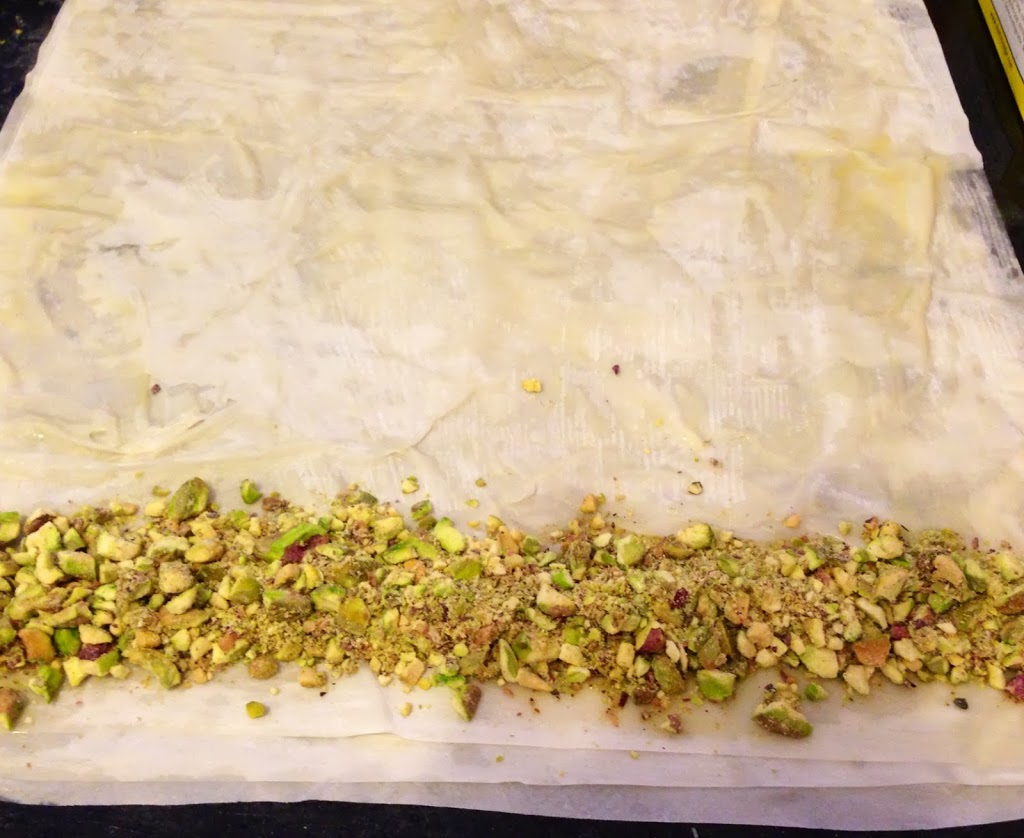
Add your ground nuts, ready to (rock and) roll
Baklava rolled up, ready to bake
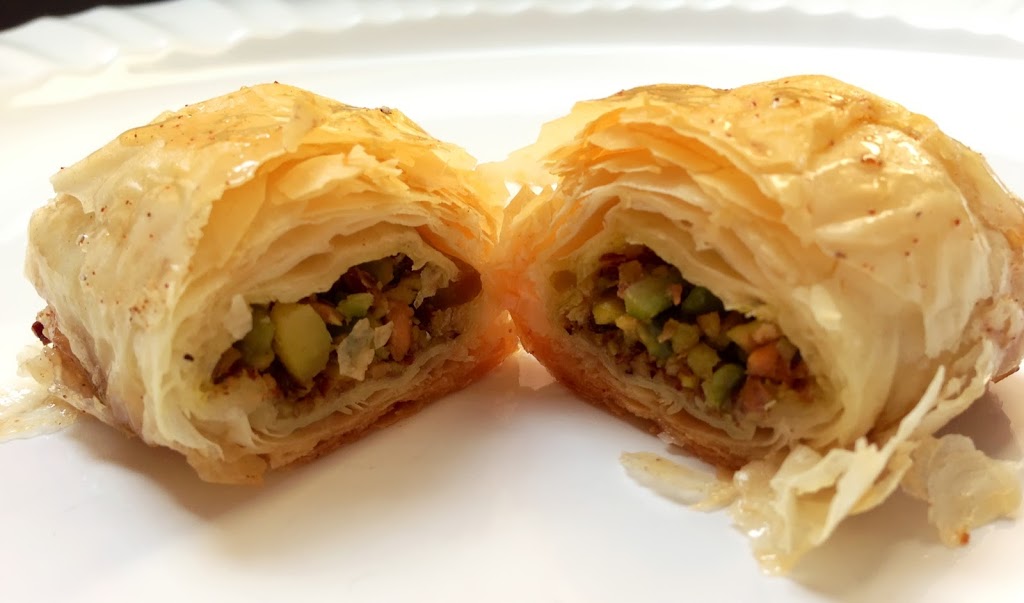
Pistachio Baklava, baked and ready for syrup
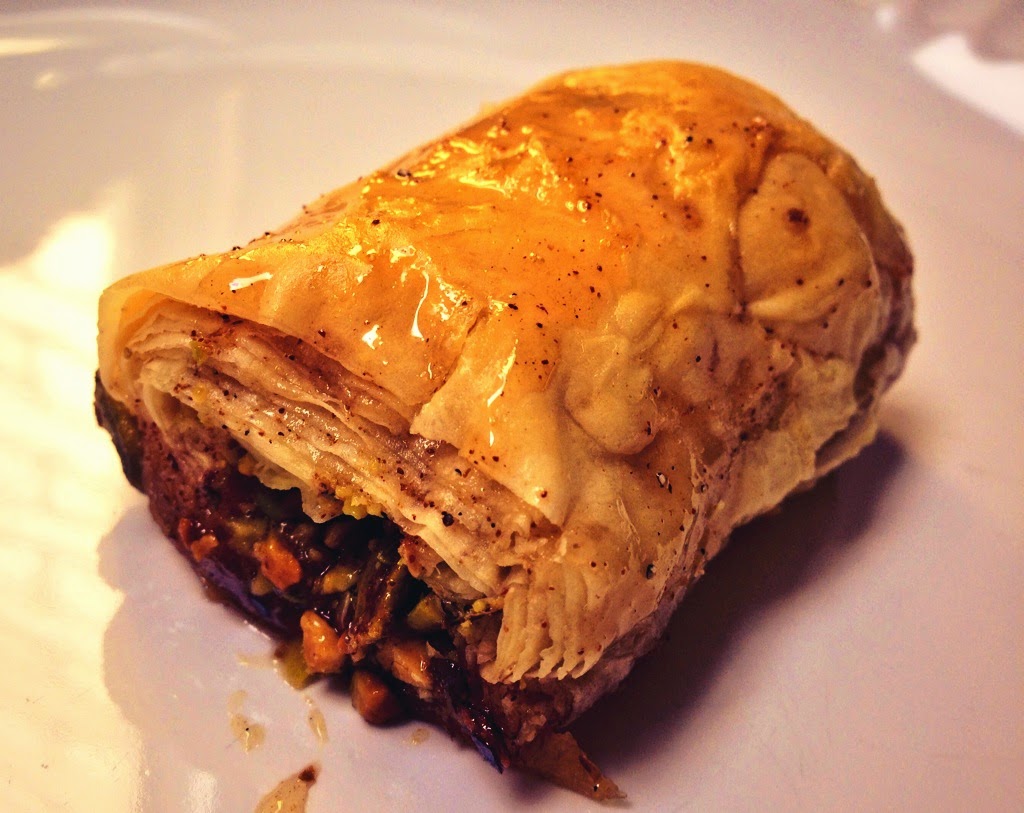
Baklava, ready to eat!
I hope you like reading Cocoa & Lavender as much I do, and enjoy this baklava recipe!
Persian Pistachio Baklava - A Nutty Collaboration!
A delicious Persian baklava made with pistachios instead of the more commonly used walnuts.
Ingredients
FOR THE BAKLAVA BASE:
1 package of phyllo (fillo) dough, thawed
1 stick + 1 tablespoon butter
1.5 cups unsalted crushed pistachios
1 teaspoon sugar
¼ teaspoon rosewater (golab)
FOR THE SYRUP:
⅓ cup sugar
⅓ cup honey
⅓ cup water
⅛ teaspoon cardamom
¼ teaspoon cinnamon
Juice of 1 lemon
Instructions
Prepare the syrup by combining all the syrup ingredients in a saucepan over medium-low heat. Bring the ingredients for the syrup to a boil and let it simmer for 10 minutes. Remove the syrup from the heat and let it cool. The syrup can be prepared a day in advance.
If needed, prep your pistachios by peeling and chopping them (a food processor is ideal, but I did mine in a Ziploc bag and a blunt object!).
While your oven is preheating to 350 degrees, melt one stick of butter. Use some to butter a baking dish, and keep the rest to brush onto your phyllo dough layers, which will make your baklava flaky and delicious.
Prepare the nuts by mixing it with a teaspoon of sugar and rosewater. Keep it in a bowl with a spoon nearby.
Take the phyllo dough out of the freezer and keep it next to you with a damp towel draped over it to keep it moist while you work, otherwise it will dry out and rip on you.
Flour your working surface, and begin by laying down the first sheet of phyllo dough. Brush the entire sheet with butter. Repeat this two more times so that you have 3 sheets of phyllo dough coated in butter.
Spoon a modest amount of your pistachio mixture horizontally onto the shorter end of the phyllo dough stack. Try to keep the pistachios about ¼ inch from the edges to minimize spillage.
Roll up the baklava by pulling up the end of the sheet and rolling it over as tightly as possible until you almost reach the end of the sheet. At the end, use an extra dab of butter to seal the edges. You'll now have a long sushi-like baklava roll. (This site has a great photo-tutorial of this process).
Slice your baklava roll into 2 inch pieces and place into the buttered baking dish. You'll want the baklava to be fairly cozy with one another.
Repeat 5-8 until your baking dish is full or you've used up all your phyllo.
Bake for 35-40 minutes until golden brown.
Remove from oven and pour the syrup over the baklava immediately. Let baklava sit for about an hour - this will allow the syrup to get in all the nooks and crannies and do it's magic. It's worth the wait.
At the risk of sounding like a lush, I want to share my latest discovery: Jack Daniel’s Tennessee Honey Whiskey. It’s smooth, sweet and the perfect after-dinner drink.
Jack Daniel’s Tennessee Honey Whiskey
So if you’re of drinking age, grab some ice cubes and a glass, and enjoy a few sips of this delicious whiskey!


Recent Comments